Simplify setup
Setting up a Pigeonhole from the Dashboard is an easy task. However, you might want to have it automated or set up many different sessions, which can be tedious and time consuming to accomplish on the Dashboard. The Pigeonhole Live API provides you with an interface to easily manage and automate your event workflow, so that the setup process can be simplified.
- API Key (this will be assigned to the variable
$API_KEYin this guide)
- Where to find documentation
- Fetch your Pigeonholes
- Creating a Pigeonhole
- Creating a Session
- Creating multiple Registrants
Step 1. Where to find documentation
The Pigeonhole Live API documentation can be found in the API Docs section of the Developer Center. This documentation lays out all the available endpoints provided by the API with examples on their usage and responses.
Where to find documentation
Step 2. Fetch your Pigeonholes
To familiarize yourself with the workspace, let’s fetch the Pigeonholes in it.
Make the following request:
curl -X GET https://api.pigeonholelive.com/v2/pigeonholes \
  -H "X-API-KEY: $API_KEY" \
  -H "Content-Type: application/json"
You’ll get a response containing all Pigeonholes in the Workspace:
{
  "data": [
    {
      "id": 1,
      "name": "This is a Pigeonhole!",
      "description": "Welcome! All available sessions are shown below. Tap on any to enter and start engaging.",
      "passcode": "ABCDEF",
      "startDate": "2019-11-26",
      "endDate": "2019-11-29",
      "status": "ended",
      "timezone": "Asia/Singapore",
      "attendeeProfiles": true,
      "registrants": false,
      "attendeeCodeRequired": false,
      "links": {
        ...
      }
    }
  ],
  "links": {
    "next": "https://api.pigeonholelive.com/v2/pigeonholes?cursor=Y3Vyc29yXzI1NzQ4MQ=="
  },
  "meta": {
    "perPage": 30,
    "nextCursor": "Y3Vyc29yXzI1NzQ4MQ==",
    "hasMore": true
  }
}
Some parts have been omitted for brevity
The Pigeonhole Live API provides cursor-based pagination functionality. In every response body, metadata about the page
is returned along with a link to the next page under links.next.
To fetch the next page, we can simply replace the link in our command:
curl -X GET https://api.pigeonholelive.com/v2/pigeonholes?cursor=Y3Vyc29yXzI1NzQ4MQ== \
  -H "X-API-KEY: $API_KEY" \
  -H "Content-Type: application/json"
This makes it convenient to recursively query until the last page.
Fetch your Pigeonholes
Step 3. Creating a Pigeonhole
If your Workspace is a Personal workspace, you do not need a Subscription ID.
If your Workspace is a Team workspace, creating a Pigeonhole from the API requires you to select one of the available Subscription plans under your workspace.
Once you have decided on the Subscription that will be used to create your Pigeonhole, you will need to retrieve the Subscription ID. To retrieve the list of Subscriptions, make the following API call:
curl -X GET https://api.pigeonholelive.com/v2/subscriptions \
  -H "X-API-KEY: $API_KEY" \
  -H "Content-Type: application/json"
You will get a response containing all available Subscriptions:
{
  "data": [
    {
      "id": 1,
      "name": "ACME Enterprise Team Plan",
      "startDate": "2017-04-05T00:00:00+08:00",
      "endDate": "2022-12-31T00:00:00+08:00",
      "timezone": "Asia/Singapore"
    }
  ],
  "links": {
    "next": null
  },
  "meta": {
    "perPage": 30,
    "nextCursor": null,
    "hasMore": false
  }
}
The list under data displays all Subscriptions available to the Workspace. Keep in mind the Subscription
ID shown (data[0].id), which will be required for creating a Pigeonhole.
Now that we have the Subscription ID, we proceed with creating our Pigeonhole. The required fields are listed here.
Make the following API call:
curl -X POST https://api.pigeonholelive.com/v2/pigeonholes \
  -d '{"name": "My First Event", "startDate": "2022-08-24", "endDate": "2022-08-25", "timezone": "Asia/Singapore"}' \
  -H "X-API-KEY: $API_KEY" \
  -H "Content-Type: application/json"
Remember to include your Subscription ID if you're using a Team Workspace
You will get a response containing the Pigeonhole that has been created:
{
  "data": {
    "id": 1,
    "name": "My First Event",
    "description": "Welcome! All available sessions are shown below.",
    "passcode": "DNAPMD",
    "startDate": "2022-08-24",
    "endDate": "2022-08-25",
    "status": "new",
    "timezone": "Asia/Singapore",
    "attendeeProfiles": true,
    "registrants": false,
    "attendeeCodeRequired": false,
    "links": {
      ...
    }
  }
}
Some parts have been omitted for brevity
You’ve just created a Pigeonhole through the Pigeonhole Live API!
Creating a Pigeonhole
Step 4. Creating a Session
Your Pigeonhole event is able to contain as many sessions as your event requires. Perhaps you have a fireside chat, 10 different presentations, then a talk to end it off. Setting up many sessions from the Dashboard may not be an effective way if you need speed and automation, and this is where the Pigeonhole Live API comes in.
There are many types of sessions that can be created through the API, and many customization options available. Read here for more .
For this example, we will create a Q&A Session, which requires the name, startDate and endDate fields.
To create a session, make the following API call:
curl -X POST https://api.pigeonholelive.com/v2/pigeonholes/$PIGEONHOLE_ID/sessions \
  -d '{"name": "My First Event", "type": "qna", "startDate": "2022-08-24T04:14:34Z", "endDate": "2022-08-24T05:14:34Z"}' \
  -H "X-API-KEY: $API_KEY" \
  -H "Content-Type: application/json"
Keep in mind to fill in all required fields for the session type when creating your session.
You will get a response containing the Session that has been created:
{
  "data": {
    "id": 1,
    "name": "My First Event",
    "type": "qna",
    "description": "",
    "redirectAttendeesTo": "none",
    "location": "",
    "startDate": "2022-08-24T12:14:34+08:00",
    "endDate": "2022-08-24T13:14:34+08:00",
    "createdAt": "2022-08-04T04:20:08Z",
    "sessionLabel": "",
    "buttonText": "",
    "anonymousResponses": true,
    "questionFiltering": false,
    "comments": true,
    "commentFiltering": false,
    "answers": false,
    "answerRatings": true,
    "adminCollaboration": false,
    "hideOtherAttendeesQuestions": false,
    "questionVotes": true,
    "questionsAvailableAfterEnd": true,
    "tagsRequired": false,
    "logoPosition": "header",
    "tags": "",
    "displayQuestionsBy": "top_voted",
    "externalVideoReactions": false,
    "links": {
      ...
    }
  }
}
Some parts have been omitted for brevity
With this, you are able to quickly create sessions as your event requires.
Creating a Session
Step 5. Creating multiple Registrants
A crucial part of making any event great is to provide a seamless and engaging experience for your audience. To provide a more personalized experience, you may want to set up Registrant Profiles, and with the Pigeonhole Live API, it is easy to set up tens to hundreds of profiles efficiently.
To create profiles, it has to be first enabled in the Dashboard settings. Under More settings of your Pigeonhole, click on the Attendees tab.
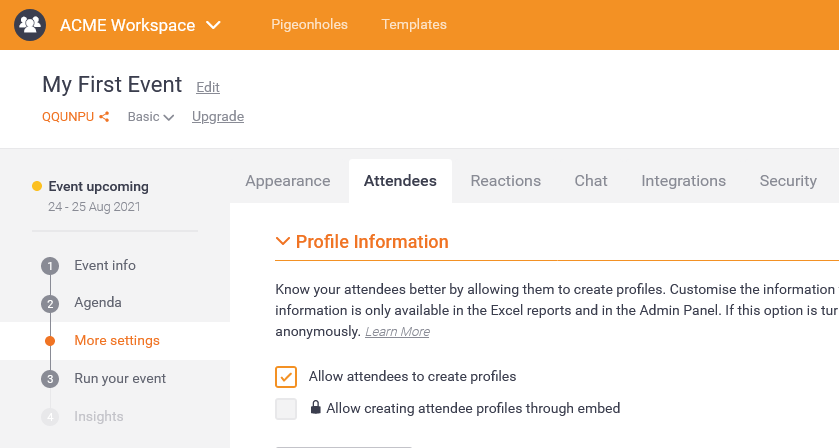
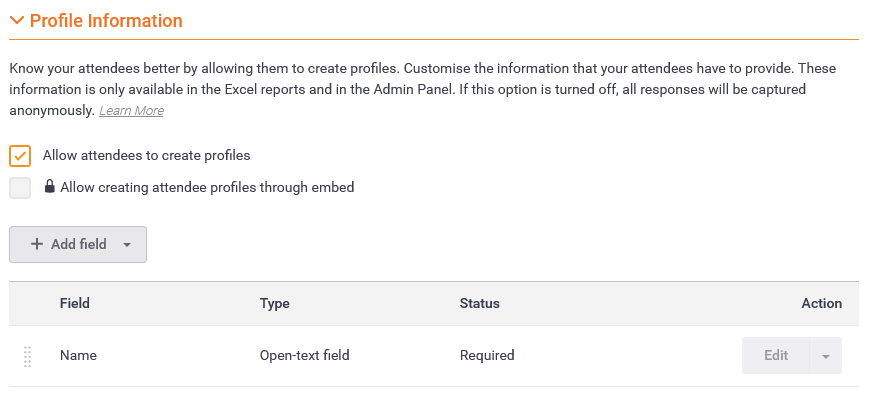
Under Profile Information, add or remove fields that you want your Registrants to contain. For this example, only the Name field will be required.
Then, at the bottom of the page, under Registrant Profiles, check Enable registrant profile for this event.
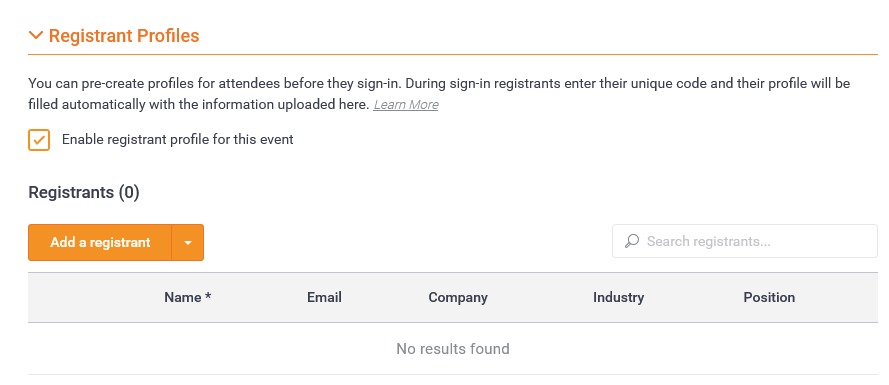
Remember to click save after enabling
Now, we are able to create Registrant Profiles from the API by making use of the bulk create Registrants endpoint:
curl -X POST https://api.pigeonholelive.com/v2/pigeonholes/$PIGEONHOLE_ID/registrants/bulk \
  -d '{"data": [{ "attendeeCode": "EVENT1", "Name": "Foo" }, { "attendeeCode": "EVENT2", "Name": "Bar" }, { "attendeeCode": "EVENT3", "Name": "Foo Bar" }] }' \
  -H "X-API-KEY: $API_KEY" \
  -H "Content-Type: application/json"
If the Registrants were created successfully, no response will be returned.
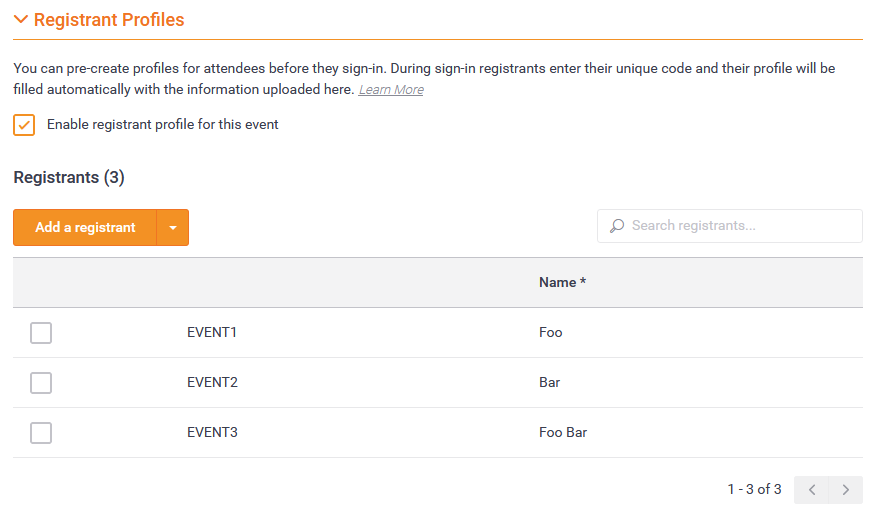
The newly created Registrants are now reflected on the Dashboard.
Creating multiple Registrants